de la Warr Analyser (2)

de la Warr Analyser (2)

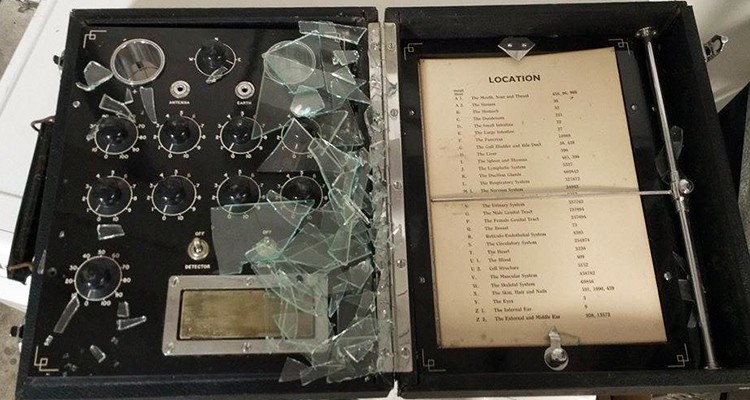
I have recently restored the control panel of this instrument. The tuning knobs are not in the best shape, but I have polished them as best I can and made necessary repairs. We have made a model of the old style knobs used on this instrument, but most manufacturer need a MOQ of 1000 pcs which is quite excessive just for a few restoration items. I have not been able to find any new old stock anywhere so we are stuck with the old ones. These knobs look to have taken damage from the broken glass while in transit.

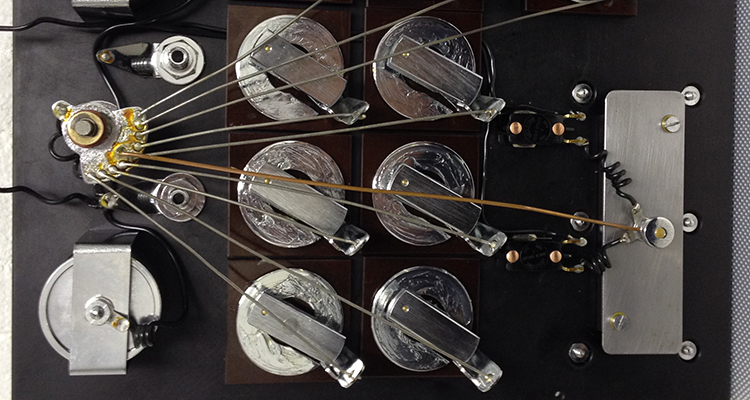
The process of restoring this panel required the complete disassembly of all the components. Well it didn’t NEED to be completely taken apart, but I’m a sucker for detail, and this way I was able to clean each and every piece of hardware. Furthermore it’s solve et coagula which allows me mastery over the instrument.

de la Warr Analyser (1)

de la Warr Analyser (1)

It has been a while since I last posted anything to this blog, so I thought I’d detail a restoration piece I am working on for a client.

When the instrument was received my client was shocked at the state of the piece. It had arrived full of glass, the window to the location sheet shattered into thousands of pieces, and the cabinet was bursting at the joints. The leather upholstery was decayed, dirty, scratched and torn. The cabinet hardware was corroded and worn.

This de la Warr analyser was sent to me for repair. I have restored my own analyser which is a much later model, so I was already familiar with the format.

The bulk of this project is restoring the cabinet which is no mean feat. To date I have disassembled the lid, stripped back the old leather, sanded the woodwork and rejoined the pieces. The quality of the original woodwork is very poor, which is why the instrument suffered some damage in the first place. I done my best to strengthen the joints and prep the wood for the new hard wearing Tolex.

Here is the cabinet. Unfortunately you can’t easily make out the broken joints from this angle.

Spooky Radionics

Spooky Radionics

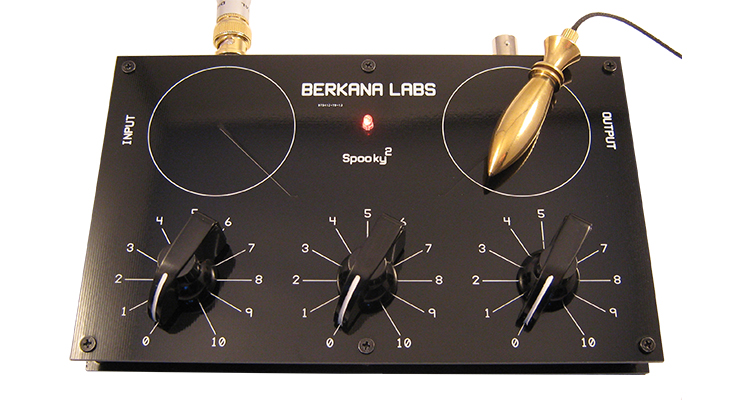
This three dial radionics device was designed to be affordable and powered by the Spooky2 XM generator. Whereas other radionic devices on the market sell for thousands and do very little, this one is a mere fraction of the cost and is extremely versatile.

Spooky Radionics has a new updated page over at Berkana Labs. You can view the page by following this link:

Spooky Radionics

http://www.youtube.com/watch?v=7YTs2fZM7Uc

Crystal Light

Check out my latest video taking a look at crystal light, and its phenomena. It’s a fascinating effect, and one which can help us to learn more about the nature of crystals.


Simple Powered Three Dial Radionics Machine

Simple Powered Three Dial Radionics Machine

Click To Enlarge

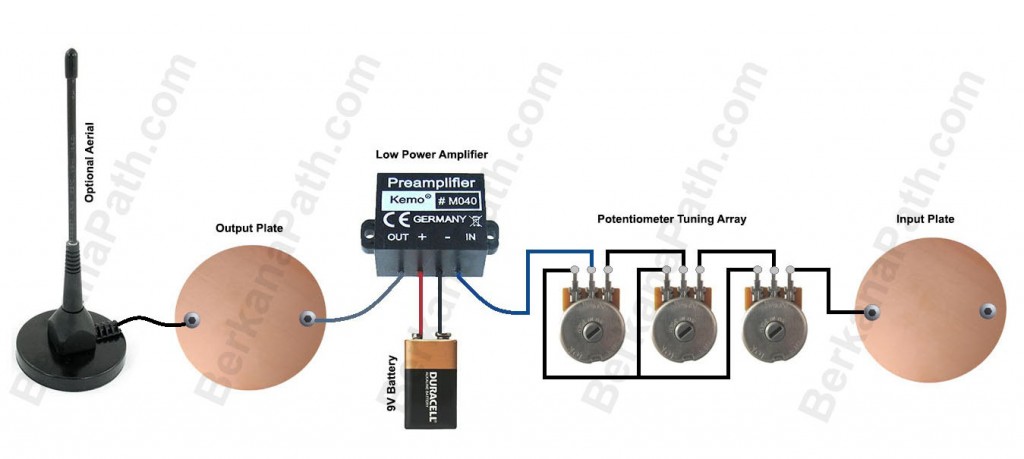
Here’s another simple schematic, based on my Super Simple Three Dial, and using the amplifier from the Wishing Machine posted yesterday. The Aerial is an optional extra, and is in no way necessary. You could experiment to see if it increases your output. As before most of this can be done with crocodile clips if you aren’t used to solder and soldering irons. I would add that it would be a good idea to secure and insulate the crocodile clips on the pins of the potentiometer, so that they are secure from pulling lose, and that the tips of the other leads don’t touch creating a short circuit.